Prefer to start from scratch? Follow this step-by-step guide to create your own wireframe using Lucidchart.
1. Select your shape libraries
Before actually creating your wireframe, you’ll need prep your workspace by pinning the shape libraries that you will need to your toolbar. With a blank document open in the Lucidchart editor, press “M” to open the shape libraries. Select the ones that you would like to use and click “Save.”
Depending on your project, you may want to take advantage of several different libraries. Here are a few to consider:
- Flowchart shapes: These standard geometric flowchart shapes are already pinned to your toolbar, and you may find it useful to keep them on hand. Use rectangles to divide a website into sections or use arrows to illustrate the flow from one UI element to another.
- UI Mockups: This shape library provides the standard array of UI containers and widgets. You will find blank website shapes as well as video, map, graph, picture, and calendar placeholders.
- Android Mockups: If you are building an app or a page for an Android device, this is where you will go to find Android phones and tablets as well as dialogues and icons that are specific to the operating system.
- iOS Mockups: If you work with iPhones and iPads, you will find them in the iOS shape library along with UI components specific to iOS.
- Images: Don’t forget the image gallery. Whether you need a classy backdrop or a specific logo, you can search for and add it directly from Lucidchart.
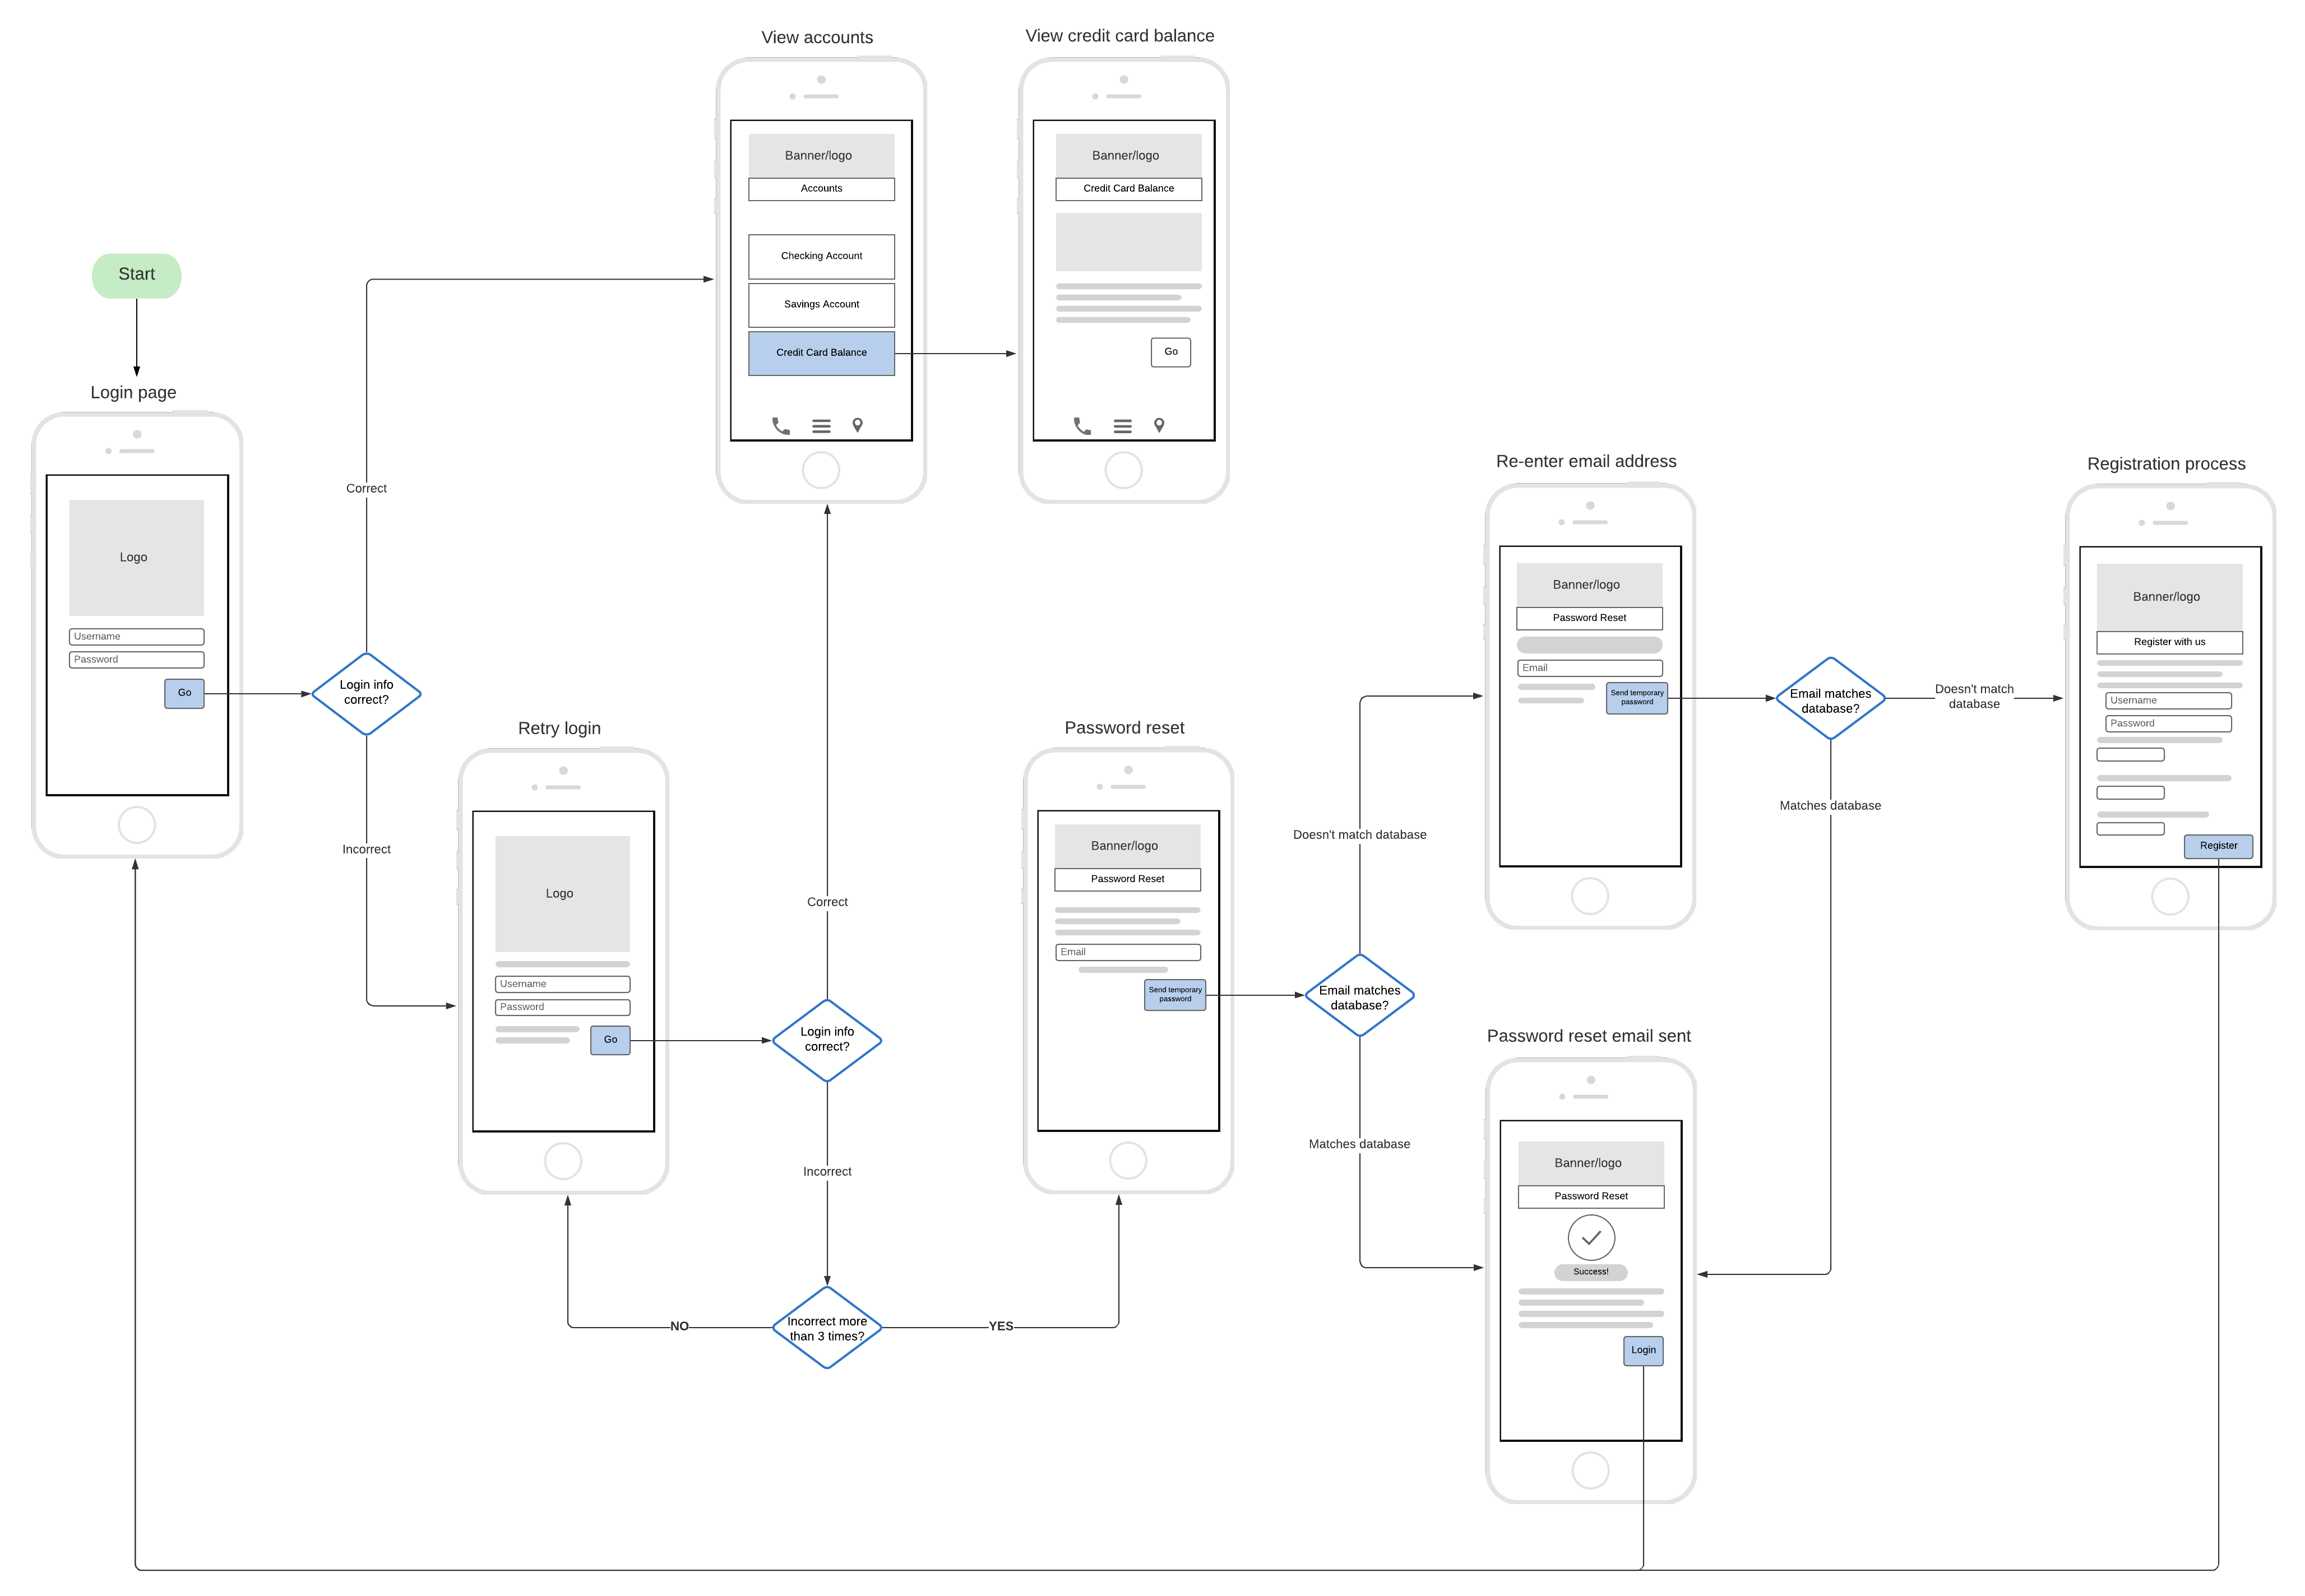
This mockup was put together using a combination of basic flowchart shapes, images, and the UI Mockups shape library.
 Try it in Lucidchart
2. Add shapes to your wireframe diagram
Begin your wireframe with the most basic shape—the container that will hold all the other elements. Depending on the nature of your design, this will probably be a mobile device silhouette or a browser window. The former can be found under the “iOS Devices” and “Android Devices” shape libraries. For browser windows, go to the “UI Containers” library.
As you add additional elements, work from general to specific, placing large design elements before moving on to small details. Use containers to create sections within your diagram—these might represent toolbars, side menus, etc.
Once you’ve placed the larger elements, begin adding individual buttons and blocks of text. Edit specific design details—such as fonts, colors, photos, and logos—last.
3. Use links, layers, and hotspots to add functionality
After you have finished laying out your wireframe, simulate website functionality using links, layers, and hotspots. These three functions allow you to create buttons that actually work, build pop-ups, link to external content, and navigate from one page of a wireframe to another. Try it out in the interactive diagram below!
Learn more about links, layers, and hotspots.
4. Map out user journey flows with mockups
User journey flows show the progression of a user interacting with an application. They can be focused on the front-end interface the user experiences or the back-end infrastructure built by the developer. Rather than sketching out a user flow using just flowchart shapes, try including mockups so that your team members will have an idea of how the application will look.