The point is, without defining what the goal is, you can’t determine if you’ve reached the goal.
3. Start with the lowest-hanging fruit
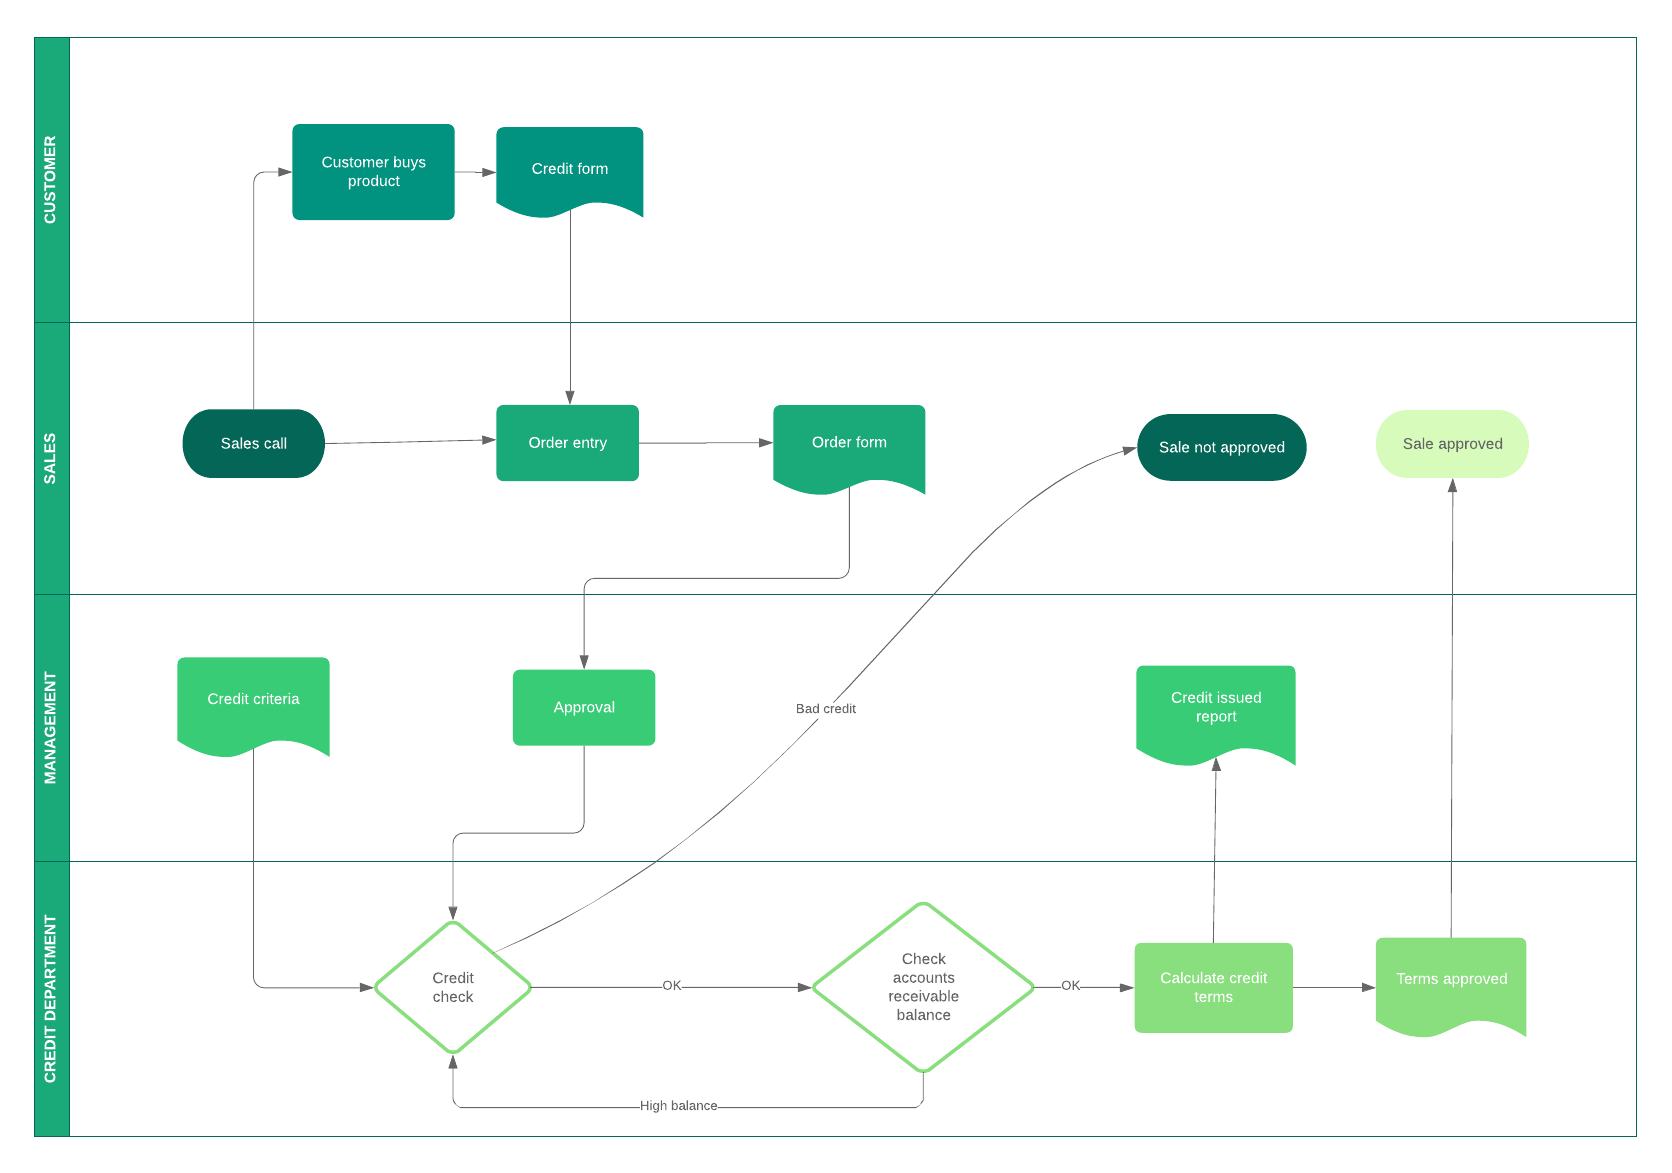
It’s important to point out that there will be many inefficiencies in the workflows you’ve defined. If you’re overwhelmed with inefficiencies and don’t know where to start, you can color-code your flowchart in Lucidchart to reflect the order of necessity. For instance:
- Green = easy to automate, big payoff
- Yellow = easy to automate, minor payoff
- Pink = difficult to automate, big payoff
- Red = difficult to automate, minor payoff
Once you have a color-coding system in place, all you have to do is start by—using the chart above—automating the green sections of your processes. Once those sections of your workflow have been implemented correctly and optimized, you can move to yellow or pink.
Using this system helps you recognize which parts of your workflow should be automated first and which parts of your workflow don’t need to be automated (or would be more of a chore to automate than it’s worth). Automation doesn’t have to happen overnight, so think of it as more of a process of improvement instead of tyrannical workflow implementation.
It’s also worth noting that there are plenty of automation software solutions that can make the process easy, such as Zapier, HubSpot, Wrike, and KiSSFLOW. We recommend a solution that works seamlessly with the apps you already use: For example, Lucidchart is integrated with Zapier, so you can send data from 1,000+ apps into Lucidchart and closely monitor your processes through visuals.
4. Get everyone on board
You’ve mastered steps one and two by detailing your current workflows and spotting the inefficiencies in them that you can easily automate. Now it’s time to break the news to the employees.
This is another instance where Lucidchart comes in handy: It’s much easier to show employees how the process is going to be automated than to tell them. Plus, if you’re using Lucidchart to visualize workflows, you can easily toggle between layers and hotspots to show your audience what the current workflow looks like and what the workflow incorporating automation looks like. Once your employees see how much better things are going to get, they’re much more likely to be excited about the change in workflow and help champion the implementation.
There’s a good chance that the automation you implement will require automation workflow software, so this is where training comes in. Instead of assuming the training should take place in a meeting, you may want to send out a questionnaire to ask how your employees prefer to be trained. Different learning styles require different teaching styles, so in some cases, hands-on training is best, but other employees may benefit from text-based documentation that they can refer back to while they are actually performing the process.
There you go! Workflow automation takes a bit of work to define and implement, but the payoff can be extraordinary. Your employees can focus on meaningful work instead of redundancies like follow-up emails and cart checkout reminders. And your whole business can work on establishing itself in the space instead of being undermined by inefficient workflows.
Start automating your processes